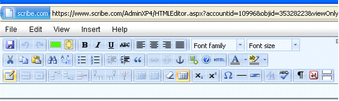
1. Tables can be created using the Table Tools. Click on the Table Tool icon to begin. |
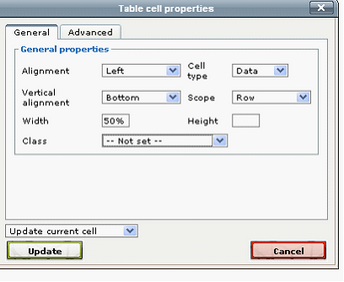
3. Put your cursor inside a cell, and right click. Select “Cell” then “Table Cell Properties” in the General tab. Here you can set the properties of the cell, including width. It is not recommended to set the cell height – allow the text size to do that for you as the cell will auto-adjust. Click Update to save changes. |
|
|
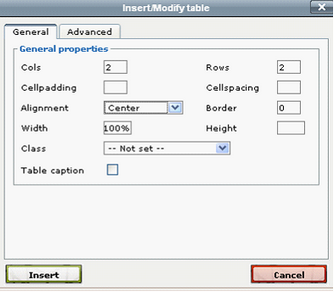
2. In the General Tab, choose the number of Columns and Rows desired, as well as the Alignment (Center is recommended) and the percent size desired (this is percent of the entire width of the editable template area – i.e. 100% will fill the entire space between the margins. Click Insert to insert the table. |
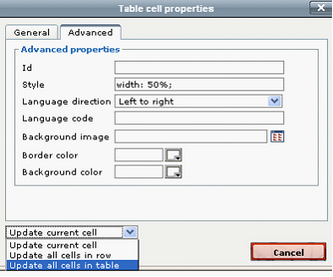
4. In the Advanced tab, you can again select language direction. Unless you want to set parameters for all cells individually, select “Update all cells in table”. Click Update to Save your changes. NOTE: HTML tables require that font and size be set individually for each cell. |
|
|