SECTION TITLES
Creating and removing section titles will be a common and necessary edit in draft documents. There are many reasons as to why a section title will be missing or improperly inserted in your draft, but the most common include the way the title was dictated and transcribed by the speech engine.
Over-generation refers to Scribe’s M*Modal Editor’s desire to make drafts as complete and accurate as possible. Sometimes, it may try too hard, and turn a dictated word or phrase into a section title. These over-generated section titles are always valid; they just do not belong given the context.
The steps for creating and removing section titles are outlined below, depending on how and where the section title is or should be.
TO CREATE A SECTION TITLE FROM THE DRAFTS CONTENT:
| 1. | Locate the content that should be structured as a section title. |
| 2. | Place your cursor before or after the desired text. |
| 3. | Highlight the text using your keyboard shortcuts (CTRL+SHIFT+Left/Right Arrow). |
| 4. | Type CTRL+N. |
TO CREATE A SECTION TITLE FROM SCRATCH:
| 1. | Locate where the section title occurs. |
| 2. | Type CTRL+N. |
| 3. | Start typing the title. If you have allowable section(s), the List of Allowable Sections will pop-up. Navigate between the section using the up and down arrow keys. To select a section, press TAB. |
TO REMOVE A SECTION TITLE AND KEEP THE TITLE CONTENT:
| 1. | Locate the section title that should be content. |
| 2. | Place your cursor within the section title. |
| 3. | Type CTRL+N. |
| 4. | Note that Scribe’s M*Modal Editor will automatically re-format the title into content. |
TO REMOVE A SECTION TITLE AND CONTENT COMPLETELY:
| 1. | Locate the section title you wish to remove from the draft, with your cursor at the beginning or end of the section title. |
| 2. | Highlight the section title using keyboard shortcuts (Shift+End or Shift+Home). |
| 3. | Press DELETE. |
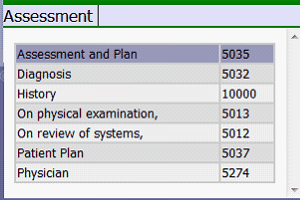
Allowable Section Titles
Prior to draft generation, allowable section titles are selected by your account or operations manager. Allowable section titles are section titles that are allowed to appear in a specific document. These section titles are assigned to individual dictators, work types, or to a whole account. When creating a section title, you will see a drop down list containing all the allowable section titles for that document. While it is possible to create a section title that is not on the allowable section title list and submit that document, it is not encouraged as proper formatting may not be applied to section titles that are not on the allowable section title list. If you are working on a verbatim account, please contact your supervisor for further guidance on this issue.
Access Allowable Sections Menu
There are two ways the access the allowable section title menu. The first way is to click Ctrl+N to create a section header, and to type any character key, at which point the allowable section title menu will open. The second way to access the section title menu is to navigate to a structured section title and start typing. As soon as any character key is clicked while the cursor is within the section header, your allowable section title menu will automatically appear. |
|
Once the allowable section title list is in view, you can navigate through the list by using your up/down arrows or simply type the first letters of the title you wish to select. As you type the letters of the section title, the section title which most closely matches the text entered will be highlighted. Once the desired section title is highlighted, hit the tab key. This sequence will populate the section title structure with the section title selected. |
|
Color Scheme
A purple section title shows that the section title you entered is a title from the allowable section title list. A green section title indicates that the text you are typing matches a section title from the allowable section title list. Once the section title lines turn green, you may press the tab key to auto-complete that section title. This can be a huge time saver as it eliminates the need to type the section title to its completion. A red section title indicates that the section title you typed is NOT in the list of allowable sections. If this happens, you have two options: |
|
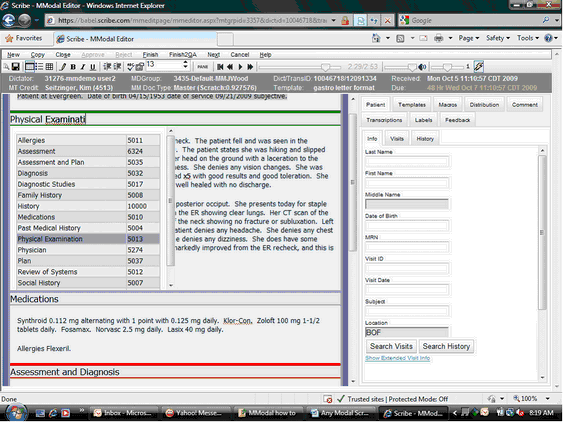
While working in Scribe’s M*Modal Editor, you will notice that section titles can be one of three colors, green, red and purple. The color will help you differentiate between a section title that is allowed in that document and a section title that is not allowed in the document.
| • | Change the title to one that is on the allowable section title list. |
| • | If you are working on a verbatim account, you may submit the document with a red section title. Please contact your supervisor for further guidance on this issue. |
SUBSECTIONS
You may often need to turn content into a subsection, especially in sections like physical examination and review of systems. This is easy to do with the shortcut CTRL+SHIFT+N. You can also use this shortcut to transition a subsection back to content.
The method for turning content into a subsection is to highlight the subsection title and press CTRL+SHIFT+N. If the title is missing from the draft, first type it. You will note that when you create a subsection, Scribe’s M*Modal Editor automatically formats the content for you.
The functionality behind subsection titles is very similar to section titles. The allowable section title list and the color scheme remain the same.
LISTS
Creating lists in AnyModal Edit is very simple when you utilize the keyboard shortcuts. Remember, when creating a list in AnyModal Edit, the listed items will always appear bulleted. The proper formatting will appear after the document is submitted.
CREATING
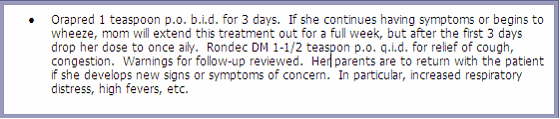
The shortcut CTRL+L will toggle a list on or off. Place your cursor at the beginning of the first item that you want to appear in your list. Press CTRL+L. This shortcut will add a bullet in front of that item. This bullet indicates that this item is now part of a list.
Example:
Plan
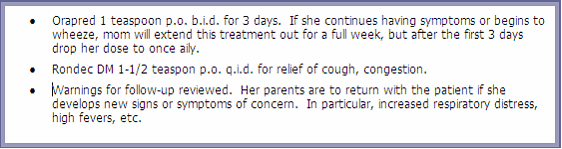
To add items to your list, move your cursor (using the Navigation Shortcuts!) to the beginning of the next item and press Enter. AnyModal Edit will move that item to the next line, automatically capitalizing it for you. Lists act the same way in AnyModal Edit as they do in Microsoft Word.
Plan
REMOVING
To turn an existing list into unstructured content, highlight the list and use the shortcut CTRL+L.
INDENTING
To indent a listed item, place your cursor on the bulleted item (you cannot indent regular text) and press the shortcut key, SHIFT+M. To remove or decrease the indentation of a list, use CTRL+SHIFT+M. There is no limit as to how often you may indent a listed item.
FORMATTING
Lists and indented lists will always appear bulleted in the draft. The appropriate formatting (bullets, enumeration, etc) is decided by the Template and is completed for you when you submit your draft back to the system for final rendering. You only need to identify where the list(s) occur.
Playback Highlighter
Editing Using the Playback Highlighter
The Playback Highlighter has two functions. The first is to make reading and listening simultaneously easier by highlighting each spoken word for you, but it also makes editing more efficient by carrying your text cursor for you. This means that when you need to make an edit, just separate your text cursor from the highlighter using the left or right arrow keys. Then make your edit and reattach the text cursor and highlighter using the shortcut CTRL+SPACEBAR. This feature allows you to maintain a steady rhythm of playback while editing.
Appropriate use of the highlighter’s ability to carry the text cursor can be beneficial to your health by making you more relaxed and less tired when editing. If you feel you are not using the playback highlighter correctly, please discuss this technique with your trainer.
Playback Precision
Playback precision is the ability to begin replaying the dictation anywhere your cursor is located in the document. You can also use playback precision as an aid when editing during playback. Once you have detached the cursor from the highlighter and begin to make your edit, you may not be able to concentrate on verifying the draft and editing at the same time. That’s okay! Once you have finished your edit, just hit CTRL+SHFT+SPACEBAR to begin playback exactly where you left off. This will start playback at the point where you finished your editing. In this manner, you can continue to verify the draft without missing a beat!
It is not recommended to use playback precision until you feel comfortable making smaller edits without stopping the audio. Most MTE do not find they are able to work with the playback precision technique until they have been editing for 2-3 weeks.
With practice, playback precision may replace your foot pedal. You can use this feature to play, rewind, and fast forward precisely on the word you wish. This is a powerful feature, as it allows you to listen to only the audio you need to listen to! How many times have you tried to rewind, only to go too far back, and then re-listened to audio you have already verified? Note that Precision Playback only works with a draft document.
Now that you have had an overview of all of the features of M*Modal, let’s get started!