Scribe sFTP Setup for a Network
Note: you can use the sFTP client of your choosing, but the instructions below are for the IPSwitch sftp client, with Olympus Digital Recorder software. Please contact your software provider if a different sftp client or different Digital Recorder provider is used.
Install Olympus Software
You must be logged in as administrator
Use all default options during install
Be sure that you select the correct voice recorder
Install IPSwitch
| 1. | From the CD, run WSFTP_ProT128_Install.exe |
| 2. | Use all the default options during install |
| 3. | When asked if you want the program to run, uncheck the box, then click finish |
| 4. | Log off the administrator account. |
| 5. | Log in as the user who will be using the Scribe FTP. |
| 6. | Launch IPSwitch |
| 7. | When asked to register, do so using the information in |
key_sftp_ element_ for_ scribe_ (XXXXX).txt
| 8. | Click Next |
| 9. | Enter in a name for the site that you will connect to (ie ScribeFTP)  |
| 10. | Choose FTP for the connection type |
| 11. | Type in ftp://inbound.scribe.com for the Server Address 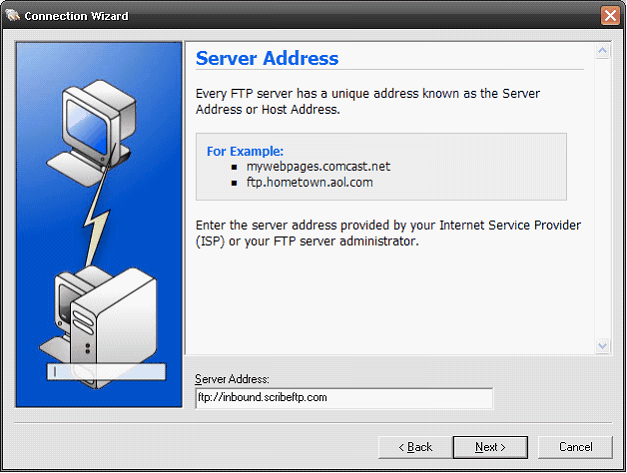 |
| 12. | Enter in the username (###) and password (#####)  |
| 13. | Click Finish |
| 14. | Close IPSwitch |
Configure Autoloader
| 1. | Copy the ScribeFTP folder from the CD to the root of C: |
| 2. | Explore to C:\ScribeFTP\PGM |
| 3. | Right click launch and click edit |
| 4. | Replace “userid” and “password” with the ftp user name and password |
| 5. | Save the file and close |
| 6. | Create a shortcut to Launch.bat on the desktop and rename to Scribe FTP |
Configure Olympus Software
| 1. | Launch the Dictation Manager software |
| 2. | Go to Tools->Options |
| 3. | Click the download tab |
| 4. | Check the Auto Download option |
| 5. | Check the Advanced Download option. Be sure that Folder A is the auto download folder. |
| 6. | Check the Delete option, but be sure that the user is prompted before deleting |
| 7. | Click the Backup Tab |
| 8. | Check the Backup option, but be sure that it does not point to the administrator folder |
| 9. | Save all options (Clicking Apply/OK) |
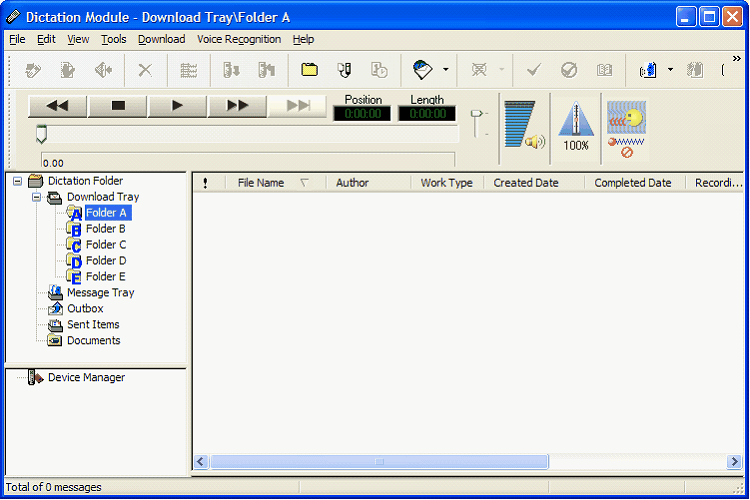
| 10. | You should be back at the main screen. |
| 11. | On the left, right click “Folder A”, and click Properties. |
| 12. | Move the location of Folder A to c:\scribeFTP\Olympus\Message\FolderA |
| 13. | Save this setting |
Setup the Author ID on DS3300 or DS4000
| 1. | Load the Olympus Pro 4 Software |
| 2. | Connect your DS 3300 to the computer using the USB cable supplied |
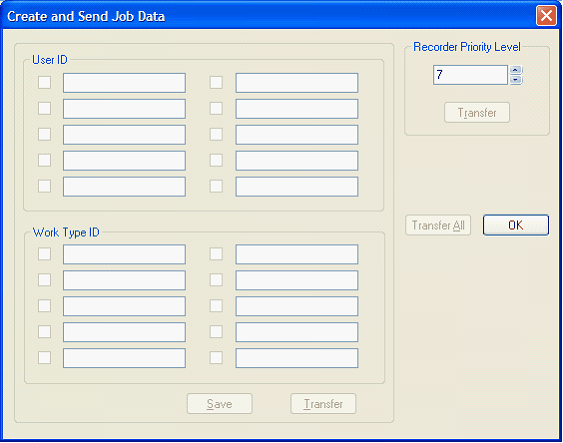
| 3. | Click on Download, Create and Send Job Data from the Menu |
| 4. | A screen to enter the UserID information pops up like below: |
In the User ID field put your ScribeID followed by the letter “Z” and then your Scribe pin number. For example if your id is 4059 and your pin is 1234, enter the following: 4059Z1234 as shown in the screen below:
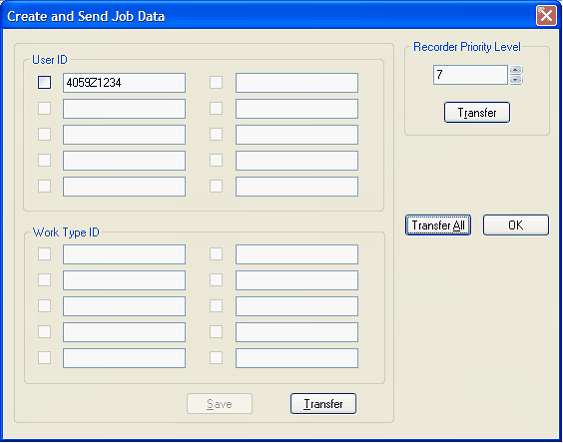
Once you have entered your information click the save button. Then click the transfer all button to transfer the ID number to the recorder. Alternatively you can click just the ID you want to transfer and click the transfer button on the bottom.
A success screen will appear:
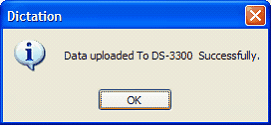
Your recorder is now ready to use with Scribe.
Setting Priority Levels
You can choose the priority level for your dictation either on the Olympus DS3300 or from the Olympus Pro Player software before you send the dictations. Note: If you have Auto-Send enabled you’ll need to make sure that priority is set on the DS3300.
To set the priority on the DS3300 you simply press and hold the “custom” button on the recorder. When you do, a triangle symbol with exclamation point will appear in the display to the left of the dictation number. This indicates “high priority”. To turn it off simply press and hold the custom button again. See page 35 in the user manual for more information.
Files marked “High Priority” will be set to “4 hr turnaround”. Normal will be set to “48 hr turnaround”.
You may assign other priorities to the device and use them to send other turn around times. This is done thru the Download, Create and Send Job Data menu. Once a priority is set on the DS3300 it will stay until changed through the software.
Scribe will interpret priorities set on the device as follows:
Priority ID |
Turn Around Time |
0-1, 7-15 |
48 hr |
2 |
24 hr |
3 |
12 hr |
4 |
8 hr |
5 |
4 hr |
6 |
2 hr |