Scribe Mobile Recommended Workflow for user with no Schedule Integration:
Dictate, Enter Patient Demographic Info and Send Files to Scribe
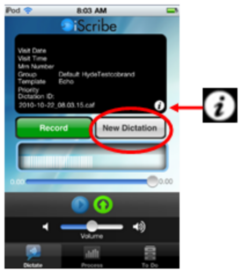
1. Open Scribe Mobile on your device. The Dictate screen will open automatically.
Click the New Dictation button in preparation to record. |
|
2. Click the information shortcut button to go to the Transcription Details Screen.
Click on any field to enter demographic information via your device’s touch keypad, or just skip this step if no further info is needed.
Click the Done button to return to the Dictation screen. |
|
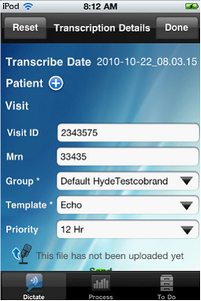
NOTE: You may clear all visit info by clicking the Reset button at the upper left hand corner of the page.
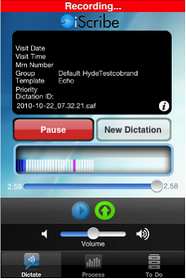
3. Click the Record button (which then becomes the red Pause button) and dictate your file. Click Pause to stop, Record to resume.
To Send your file to Scribe, click the green Send button. Once success confirmation is received (see #4), click New Dictation to begin a new dictation then To Do to select the Patient. |
|
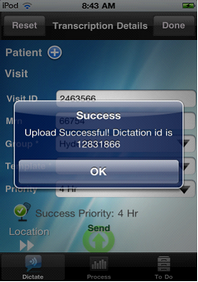
4. When a file is sent, the screen automatically displays a success receipt, including the Dictation ID, indicating that Scribe has received your file.
If you will be waiting to Send your file at a later time, simply skip clicking the Send button, and access your unsent files later via Process>Outbox. |
|
To upload multiple dictations simultaneously, see "Batch Upload of Multiple Dictations” below.
NOTE: If wireless access is too low for file transfer, the screen will show a continued “Loading” message, but no success confirmation will be received. Simply “Cancel Upload” and click on the file in your Outbox (p5) to resend when wireless access is again available.
Remember to return to the Main Dictation Screen (with the Record and New Dictation Button) and click the New Dictation Button to create a new dictation. Once you have created a new dictation, you can return to the To Do Screen to choose your next patient.
Batch Upload of Multiple dictations
To Batch Upload multiple dictations (available with Scribe Mobile version 1.2 and higher):
| 1. | Return to step 3, but do NOT click the green Send button. |
| 2. | Instead click the New Dictation button (step 1) and follow steps 2 and 3 as seen above to record additional dictations. |
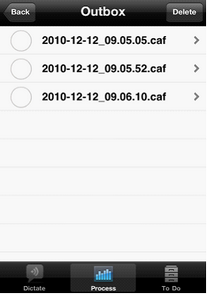
| 3. | When ready to send your dictations to Scribe, click on the Processes button at the bottom of the screen, and select Outbox. |
|
Dictations that are ready to send can be seen in the Outbox. |
|
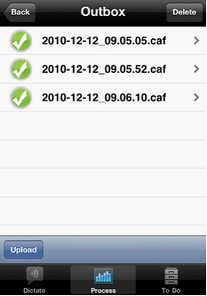
Click to the left of each dictation you wish to send, to select it for sending. Click the Upload button at the bottom left of the Outbox screen. |
|
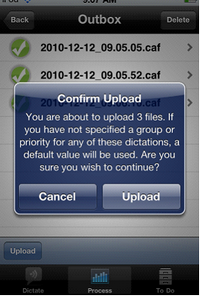
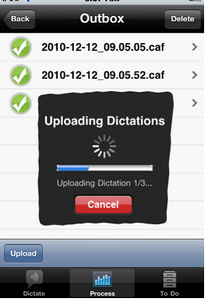
You will be asked to Confirm upload of the dictations. Click Cancel to terminate the upload, or Upload to send your dictations to Scribe. |
|
After clicking Upload, the screen will display the progress of your Upload. |
|
When Upload is complete, the files sent will no longer be in your Outbox. |
|
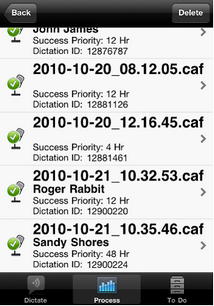
Sent files and their assigned dictation IDs can be seen by clicking the Back button at the top left of the Outbox screen, and clicking on the Sent folder. |