1. SELECT A DICTATION
When you login to your queue, the next dictation due will automatically be entirely highlighted in blue.
If a draft has been returned, you will see the blue M*Modal icon with a red check mark on it next to the dictation in your queue.
If no draft has been returned, you will see only the blue M*Modal icon. Highlight the dictation and click Enter.
2. EDITOR PAGE
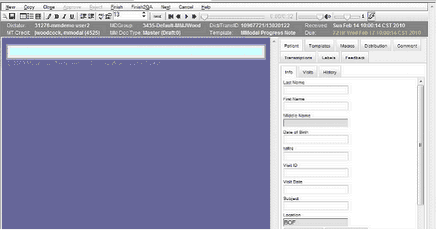
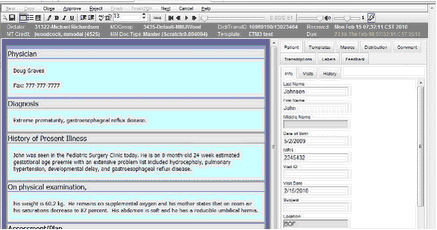
The Editor page will open displaying either the Scratch job or the Draft job.
Scratch job ready for Typing………….. |
Draft job ready for Editing………………. |
|
|
3. BEGIN DICTATION
Use your F6 hotkey to begin the dictation or click on the Play icon in the Listen Menu. You may also use your foot pedal to play the dictation (a list of compatible foot pedals is available in the Appendix). Listen for the Patient Demographic and Visit Information, pause the dictation, and type the Patient Info into the Patient Tab (see Listen Menu for more information).
If the Dictator has a Schedule Feed available to select a Visit from, click the Search Visits Button (or press the Enter key) at the bottom of the Patient Tab to find and insert the correct visit information (see Search Visits for more information).
4. SELECT TEMPLATE
If a default template is not selected for the Physician (or if a template OTHER than the default template needs to be used), click the Templates Tab. Available templates are accessible via a drop down box. Select the correct template and click the Change to Selected Document Model Button (see Templates Tab for more information).
5. LISTEN AND EDIT /TRANSCRIBE
Start the dictation again. If a draft has been returned, follow the dictation highlighter as you read the draft, pausing, rewinding or fast forwarding the dictation if necessary while correcting errors in the draft or transcribing from scratch (see p15 for Listen Menu information).
6. INSERT SECTIONS, SUBSECTIONS, LISTS OR TABLES AS NECESSARY
While your draft should return most if not all of the necessary Coded Sections and Subsections as set up for the Physician Group Any Modal console) you may occasionally need to add Sections or Subsections. Use Ctrl+N to insert Coded Sections into the draft or scratch document as necessary or Ctrl+Shift+N to insert subsections, if required by the MD (and not present in the draft). Use Ctrl+L to begin a list, or Alt+K to insert a table, if required (see p11 for Queue Page Icon information).
7. INSERT TO AND CC ADDRESSES, FAX #s AND EMAIL ADDRESSES AS NECESSARY
Use the Distribution Tab to Lookup and enter TO and CC addresses, Fax #s and Email Addresses if needed. If no address book is available and you will be typing directly into the Distribution fields, click New to add a new address (see p19 for Distribution Tab information).
8. INSERT MACROS, COMMENTS AND LABELS AS NECESSARY
See p18 for information on inserting Macros
See p20 for information on adding Comments and Labels
9. ADD A NEW TRANSCRIPTION TO A DICTATION, OR COPY PATIENT DEMOGRAPHICS TO A NEW TRANSCRIPTION FOR THE SAME DICTATION
The New Button (Alt+N) allows for creation of a New Transcription when more than one patient record is dictated in a single dictation. To use, put your cursor at the place in the draft where the next patient record should begin, and click the New Button.
The Copy Button allows for creation of a new transcription where only the demographic information is copied to the next transcription. This is often used when a letter and clinic note are requested for the same dictation. Information from the body of one transcription may be manually copied into the body of the Copy transcription manually by using Word hotkeys for copy and paste (Ctrl+C and Ctrl+V). (See p14 for information on these Editor Page functions)
10. SAVE AND FINISH, FINISH TO QA, OR CLOSE THE TRANSCRIPTION TO FINISH LATER
Save by keying Ctrl+S or by clicking on the Save Icon. Note that only the Save icon will restart the session timer, and that your session will automatically time out after 40 minutes, unless you have clicked the Save Icon in the meantime.
Finish (Alt+F) and Finish2QA (Alt+Q) are only available in the MTE queue, NOT the MTQA queue. Finish sends the completed job through Scribe’s AI for scoring, and then on to the Physician’s Inbox as long as it passes the AI threshold score. Finish2QA sends the job to the MTQA queue for review my QA staff EVEN if the job has scored high enough to pass the AI threshold. Finish will send the Published job directly to the Physician Inbox if it passes the AI score threshold.
Cancel allows the user to back out of a transcription without applying MTE ownership to the transcription, and can only be used prior to the first Save.
Close allows the user to close a dictation (Alt+S) without finishing it, to return to your queue or to open the next dictation. Note that once you have made and saved edits to the transcription in the MTE queue (NOT the MTQA queue), that Close will be your only option. Cancel will no longer be available.
Next allows the user to move on to the Next dictation without returning to the queue or finishing the current dictation.
(See p14 for information on these Editor Page functions).

