Create New MD Group Guide
Click on Management and then scroll down to New Group.

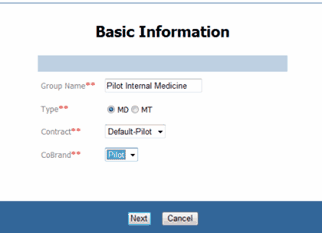
Enter the Group Name, click MD for Type. Select the appropriate Contract and CoBrand from the draw down menu. If okay, click Next.
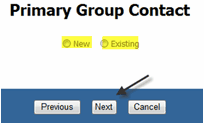
If the administrator has not been added to the system, you should click on the “New” button and complete the contact information. If the administrator has been added to the system at some previous time, click on the Existing button. We will click on New, then Next at which point, you will enter the Primary Group Contact/Administrator.
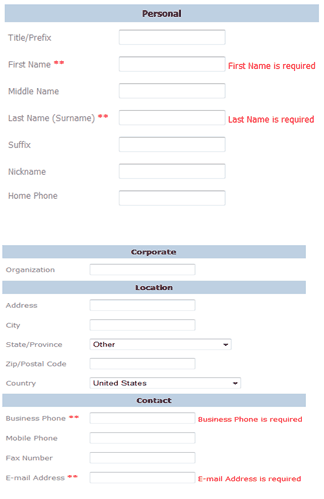
Note: The required fields are First and Last Name, Business Phone, and Email Address.
Existing User:
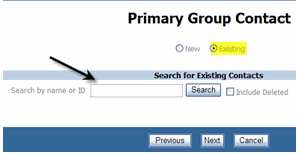
If the administrator is already in the system, you should click on the “Existing Button.” Enter the name in the search field and click on the “Search” button. Proceed through the wizard by clicking the Next button.
Our search for an existing member “Pilot” yielded these results:
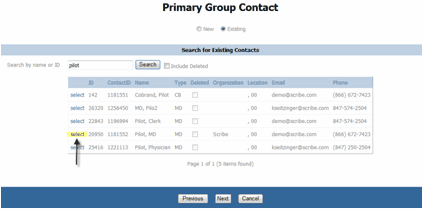
Once you locate your user, click on the “select” hyperlink and the information regarding this contact will appear. Review the information on the next screen.
Click on next if this is the correct contact or go back to previous menu if needed.
The next section asks you to add members. Because you are adding a new group, you will skip this section and proceed to Transcription Processing by clicking the next button. You will come back to this section after the group has been set up.
Set Transcription Processing
AutoFax to: and the AutoEmail:
Autofax: Will allow multiple fax numbers to be entered. May be used if your customer desires faxing of a preliminary report. Can be set at the user or group level. A Scribe system fax cover sheet is sent. Tracking will show on the MD platform.
AutoEmail: Will allow multiple email addresses. May be used if your customer desires emails of a preliminary report. Can be set at the user or group level. Tracking will show on the MD platform.

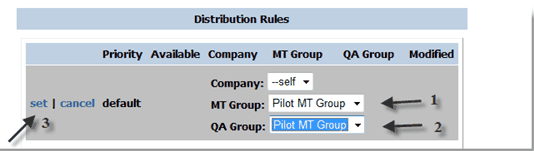
For the Distribution Rules select the priorities (TAT) that are required for this group by clicking on edit and checking the selected priorities. (The default does not have a checkmark box). In this example, the default, 48 hour and 4 hour priority is currently unassigned. You MUST have a MT Group and QA group assigned to assure the proper routing. To assign the MT and QA group for the default, 48 hour and 4 hour options, click on edit. A new box will open. Select the appropriate information and click on Update. You can change the TAT to your preference.
NOTE: The TAT must be assigned at the group level. In other words, all of the users in the MD group, must have the same TAT. For example, if all members in the MD Group require a 48 hour TAT and 24 hour TAT, but Dr. B. requires a 4 hour TAT, you must setup Dr. B in own MD Group.
Setting TAT to other than the default:
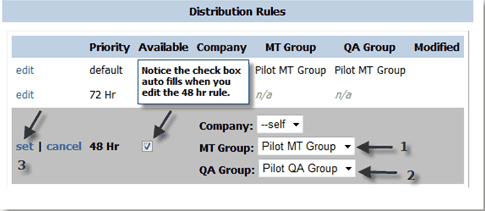
Once you have “edited” all selections, the transcription processing is complete.
Click the next button to see the Review Information page.
If the information entered is accurate, click Finish, or you can return to the previous screen by clicking on Previous. When you click Finish you will see a screen that will look like this:
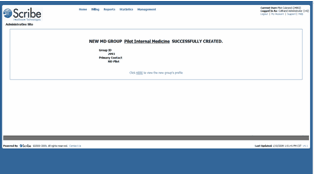
Hint: Note the Group ID number. If you were to search for Pilot Internal Medicine, you could search via the Group ID number as well.
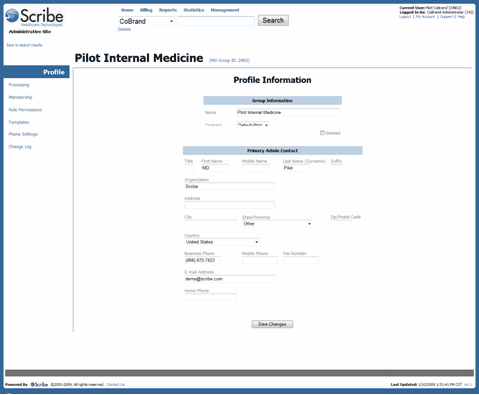
Upon clicking the Click Here hyperlink the following screen displays. This is the profile information for the MD Group just created
Rev 12/4/2009