Once the computer restarts, the screen should have a Scribe Direct logo in the middle. In the tool tray in the bottom right hand corner, there should be a Scribe Direct icon.
![]()
Right Click on the Icon
The Menu List will appear
Click on Configuration Wizard
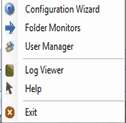
You Will only get this screen the first time Scribe Direct starts after the initial install:
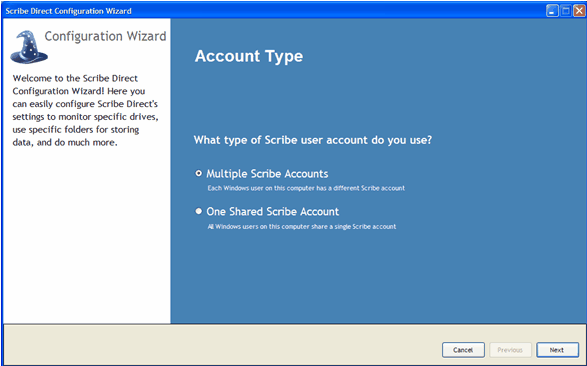
Multiple Scribe Accounts: Each login will have to configure Scribe Direct when they logon.
One Shared Scribe Account: Configure Scribe Direct 1 time and it will use that configuration for each user who logs on to the computer
The Scribe Direct Logon Information Screen will appear:
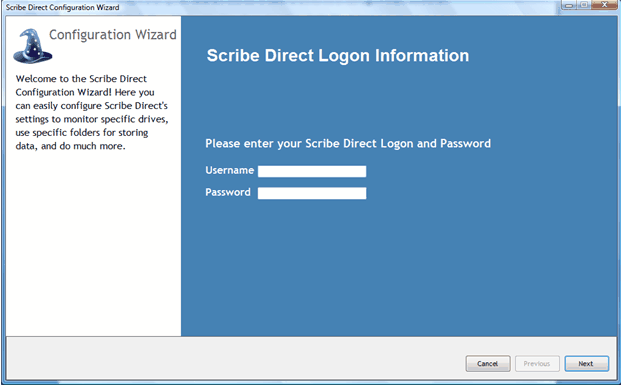
You must enter a valid Scribe MD Username and Password
Notes: if uploading files for more than one Doctor of the group with this PC, the user needs Can View Group Files permissions.
When you click on Next, you will get the Scribe Folders Screen
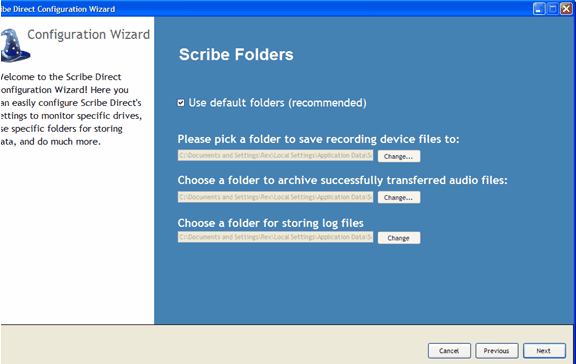
At this screen you can customize which folders you would like Scribe Direct to place the Incoming files (from the Doctors), the Archived Files (that have been successfully uploaded to Scribe), and the Log Files from the process. *You must have the designation \incoming, \archive, \log at the end of each path*
When you Click Next you will come to the File Monitoring Screen
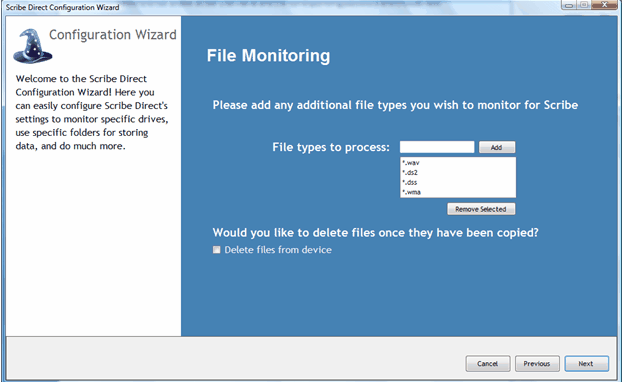
On the File Monitoring screen, you can remove or add file types that you want Scribe Direct to process.
The Option: Would you like to delete files once they have been copied? Refers to deleting the files from the recording device once that have successfully been uploaded into Scribe Direct. It is defaulted not to, but this means the files will need to be manually deleted from the device.
Choose Next, You should see the Application Preferences Screen.
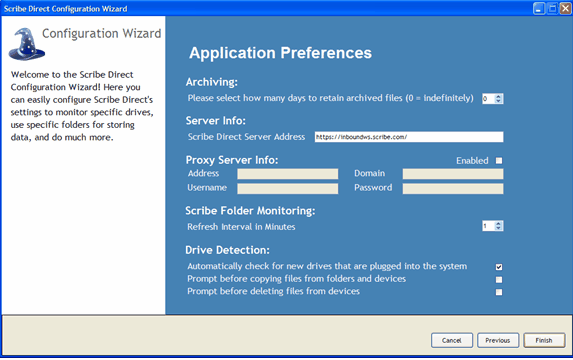
You have control to set:
Archiving – Scribe Direct defaults to keep files indefinitely in the archive
This time can be set so there is hands free maintenance of the files.
Server Info - This is the Scribe Direct Server Address
Scribe Folder Monitoring - How many minutes between retries of Scribe Direct scanning a monitored folder for new files (for more information please refer to the Folder Monitors section)
Drive Detection -
Defaults to:
Automatically check for new drives that are plugged into the system
(Devices that are recognized as an external USB device by the PC will also be detected by Scribe Direct)
Do not prompt before coping files from folders and devices
(If you check this box a screen will appear that states the device has detected files and would you like to import them, You must respond to this screen before the files are imported if this box is checked)
Do not prompt before deleting files from device
(this only works if the “Delete Files for device” option has been chosen on the Folder Monitoring screen)
Choose Finish
You will be asked:
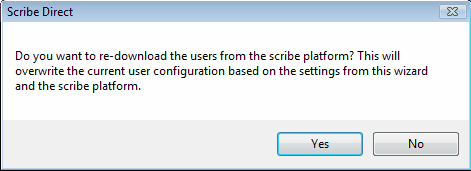
Choose yes and then you will get this screen:
Scribe Direct is now configured and ready to import files
Any time a new doctor is added to a group:
The Scribe Direct User Manager will need to be updated, prior to being able to upload files.