Olympus DS3300 Setup Guide
Introduction
This Guide will walk you through some basic instructions on how to setup your new Olympus DS3300 to work with Scribe.
This guide covers the following steps:
| 1. | Setup the Olympus Pro Player Software |
| 2. | Setup the DS3300 with your Author ID |
| 3. | Send Files To Scribe |
| 4. | Change Priority of Dictation Files |
For more complete instructions and customizations please consult the manual provided with the DS3300 and the online help provided with the Olympus Pro Player software.
Setup Olympus Pro 4 Software
| 1. | Install the software on your PC following the instructions given in the manual. |
| 2. | From the computer's "Start" menu, go to All Programs>DS Player Pro>Dictation Module |
Select "Options" from the Tools menu and then click the "General" tab, and check the boxes seen below.
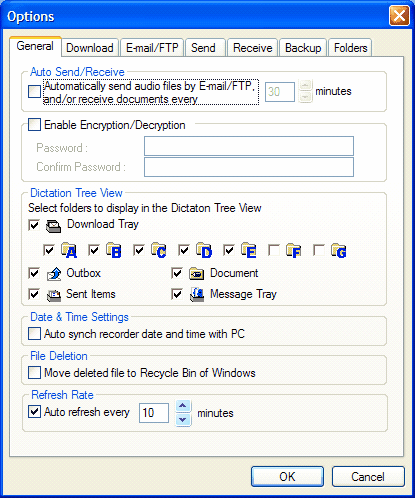
Then Click the Email/FTP Tab.
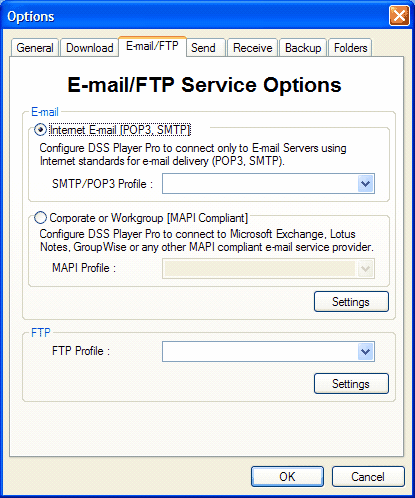
| 3. | If using email, select either Internet email or Corporate/Workgroup email. If you already have Outlook installed and use that to send messages then select the Corporate/Workgroup email option. |
NOTE: To configure the "Corporate or Workgroup" option, Administrative Access may be necessary, as the "to" email address can only be configured in this software version by ensuring that the DSS Player pro software can access the Outlook address book (see your network administrator for more information).
To Setup Internet Email
| 1. | Create a profile for each communication method by clicking the Settings button. |
![]()
A screen like below will pop-up
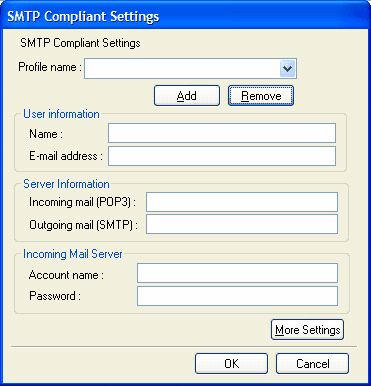
Click the Add button to add a new profile. This screen appears. Enter your profile name and click the OK button.

Then enter your mail settings in the screen below:
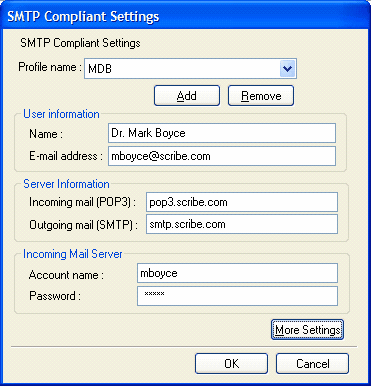
NOTE: You may need to speak with your network or email administrator to get the proper email settings. There are also advanced settings for email that you can use by clicking on the "More Settings" Button.
When you are finished, click "OK" to save the profile you just created.
You’ll be returned to the options screen. Make sure the profile you just entered is selected from the drop down and then click "OK".
To Setup Work Group/Corporate or Use Microsoft Outlook to send files
First, enter olympus@scribe.com in your Outlook address book. this is necessary to enable the program to select this email address during a later step in email setup. If you are on a Network, you may need to have your Network Administrator grant the DSS Player Pro program access to your Outlook address book to complete setup. See your Network Administrator for assistance.
| 1. | Click the option for "Corporate or Workgroup" email as seen in the screen below: |
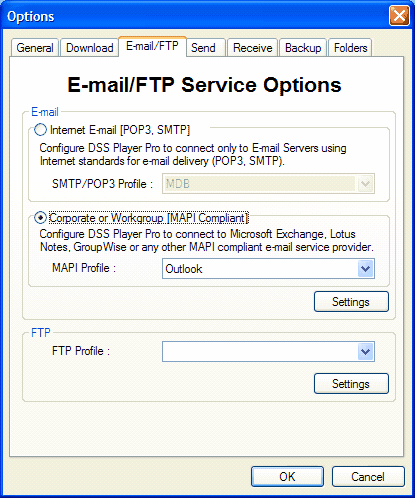
| 2. | A list of MAPI profiles will appear in the drop-down box. Choose the profile you wish to use (for example you can choose Outlook as depicted). If you need to change any of the settings for these just click on the settings button. |
| 3. | Click "OK" to save your option changes. |
Setup the Author ID on DS3300
| 1. | Load the Olympus Pro 4 Software |
| 2. | Connect your DS 3300 to the computer using the USB cable supplied. There must be NO dictations on the recorder to complete this step. If you have live dictations on your recorder prior to this configuration, you will need to perform the "Drag and Drop" method of sending these files to Scribe prior to setting the Author ID on the recorder. See Method 2 under To Send a File (below). |
| 3. | Click on Download>Create and Send Job Data from the Menu |
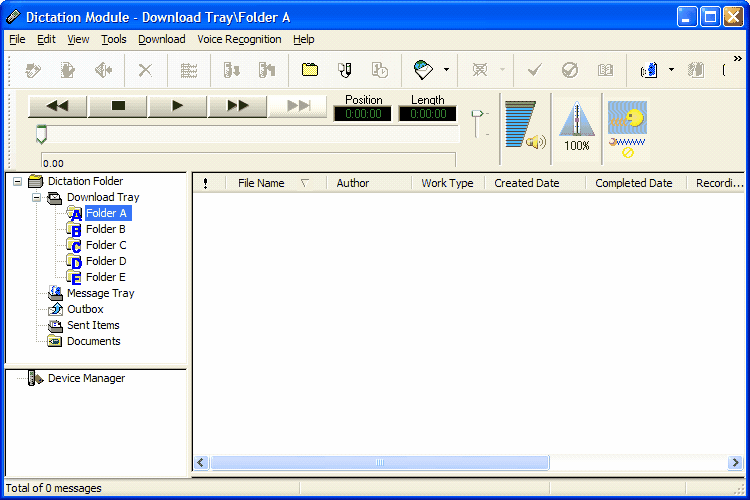
| 4. | A screen to enter the UserID information pops up like below: |
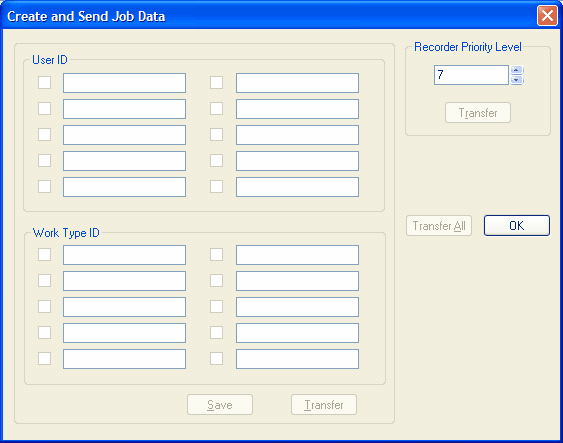
In the User ID field put your Scribe ID followed by the letter “Z” and then your Scribe pin number. For example if your ID is 4059 and your pin is 1234, enter the following: 4059Z1234 as shown in the screen below:
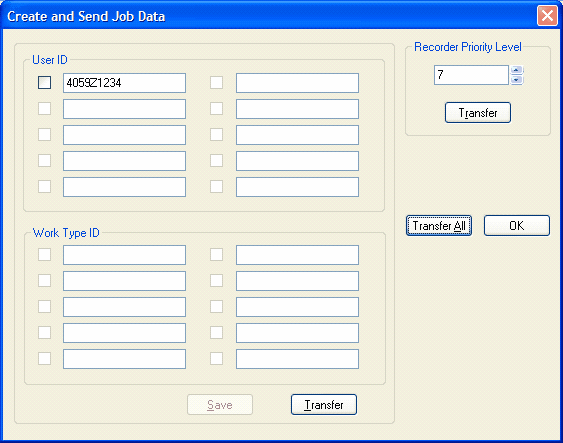
Once you have entered your information click the Save button. Then click the "Transfer All" button to transfer the ID number to the recorder. Alternatively you can click just the ID you want to transfer and click the transfer button on the bottom.
A success screen will appear:
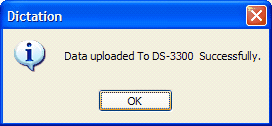
Your recorder is now ready to use with Scribe.
Note: For those of you using your recorder with multiple groups on Scribe you’ll need to enter multiple Job IDs as follows: Follow the same procedure as before but enter your author id instead to include a “G” followed by your group id at the end. For example if your id is 4059, pin is 1234 and the first group you use is 245 then enter your author ID as 4059Z1234G245 . Repeat the procedure for as many groups as you belong to and then transfer the IDs to your recorder using the instructions above.
To Send a File:
There are a variety of ways to send files to Scribe. Each method is described below:
Method 1 – Using the Olympus Pro Player Software
Using the Pro Player Software files can automatically be sent to Scribe each time you download them to the software as follows:
| 1. | Click the Tools menu and then click on Options |
| 2. | Click on the Send Tab and you’ll see the screen below: |
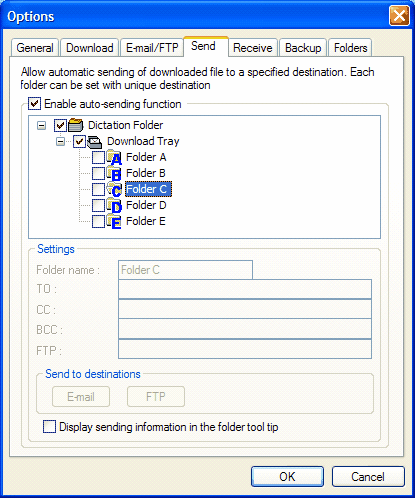
| 3. | Click the enable auto-sending function box and then check the boxes of the folder you would like to auto-send (all are recommended). |
| 4. | When you click the folder check box you’ll be able to enter information in the settings boxes below as follows: |
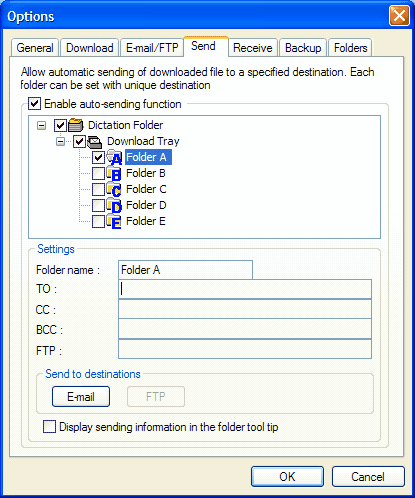
| 5. | Then click on the Email button |
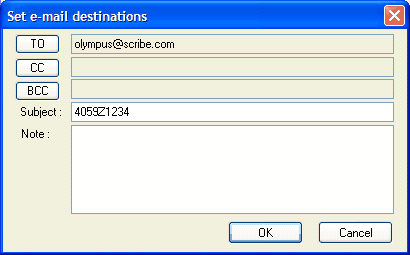
| 6. | You’ll see a pop-up box like this: |
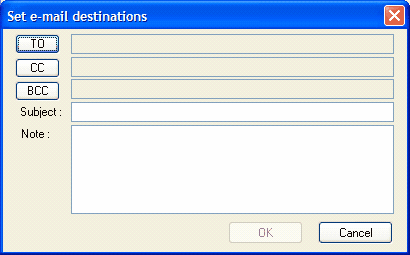
| 7. | Click the To button and then select the email address of Olympus@scribe.com from your Outlook address book. |
| 8. | If only one recorder will be docked for sending dictations at this computer, then in the subject line put your scribe ID and pin number as follows – if your scribe id is 4059 and your pin is 1234 then you would enter 4059Z1234 in the subject line. |
| 9. | Your screen should look as follows: |
| 10. | Then click ok to save your settings. |
| 11. | Now every time you download files to that folder it will automatically email them to Scribe. |
Note: If you have multiple Groups that you do dictations for with Scribe you’ll want to setup separate folders for each group. Then when setting up the auto email make sure you add your group information in the subject line as follows: If your user id is 4059 and your pin is 1234 and the first group you send to is 245 then you’ll put the following string in the subject line – 4059Z1234G245 .
You’ll repeat the process for as many groups as you have.
Method 2 – Drap and drop (or attach) files into an email for sending to Scribe
To use your own email client to send the files simply follow these instructions:
| 1. | Open your email client |
| 2. | Create a new message |
| 3. | In the TO box for the new message enter Olympus@scribe.com |
| 4. | In the SUBJECT line for the new message enter your userid, “Z” and pin (and NOTHING else) as follows: if your Userid is 4059 and pin is 1234, then enter 4059Z1234 in the subject line. |
| 5. | Open the Olympus Software and download the files from your recorder. |
| 6. | Drag the files you want from the Olympus Pro Player Software to your email message as attachments. |
| 7. | For email clients that do not support "drag and drop," you must browse for the files on your hard drive to attach them to the email message. |
| 8. | Send the email message. |
Setting Priority Levels
You can choose the priority level for your dictation either on the Olympus DS3300 or from the Olympus Pro Player software before you send the dictations. Note: If you have Auto-Send enabled you’ll need to make sure that priority is set on the DS3300.
To set the priority on the DS3300 you simply press and hold the “custom” button on the recorder. When you do, a triangle a symbol with exclamation point will appear in the display to the left of the dictation number. This indicates “high priority”. To turn it off simply press and hold the custom button again. See page 35 in the user manual for more information.
Files marked “High Priority” will be set to “4hr turnaround”. Normal will be set to “48 hr turnaround”.
You may assign other priorities to the device and use them to send other turnaround times. This is done through the Download, Create and Send Job Data menu. Once a priority is set on the DS3300, it will stay until changed through the software.
Scribe will interpret priorities set on the device as follows:
Priority ID |
Turn Around Time |
0-1, 7-15 |
48 hr |
2 |
24 hr |
3 |
12 hr |
4 |
8 hr |
5 |
4 hr |
6 |
2 hr |
.